
LASHBLOOM ACADEMY · DESIGN & DEVELOPMENT
Turning a Creative Concept into a Product Sample
A lash design often begins with a simple idea: a look someone wants to create, a detail they have noticed, or a product feature they would like to explore. Turning that idea into a physical sample, however, requires more than inspiration. It requires clear descriptions, thoughtful choices, communication, and careful review.
In this lesson, you will follow the general journey from an early design idea to a sample that can be evaluated and refined. The exact process may vary depending on the product type, materials, construction method, and manufacturer.
What You Will Learn
- How to turn a general idea into a clearer design direction.
- How to describe important lash design features.
- What information to include in a design brief.
- What to discuss with a manufacturer before sampling.
- How to observe a sample and give useful feedback.
- How to organize your ideas into a practical development brief.
1. Start with the Idea
A design idea can come from many places: a visual reference, a customer preference, a particular occasion, a trend, or a problem with an existing product. At this early stage, the idea may still be broad.
For example, “I want a soft, natural-looking lash” gives a general direction, but it does not yet explain what the design should look like or how it should be constructed.
Ask What the Idea Is Meant to Achieve
Begin by describing the intended appearance and context:
- Who is the intended user?
- What kind of appearance should the design create?
- When or where might someone wear it?
- What should make this design different from an existing option?
- Is there a reference image or physical sample that helps explain the idea?
These questions help separate the design goal from the details that still need to be decided.
2. Define the Design Features
Once the general direction is clear, describe the visible features of the lash design. The four elements from the previous lesson provide a useful starting point: length, curl, density, and arrangement.
Length
Describe whether the fibers should appear relatively even or include visible length variation. If longer sections are desired, explain where they should appear within the design.
Curl
Describe the intended curve in visual terms, such as gentle or more pronounced. If a product uses a curl label, confirm what that label means within the relevant manufacturer’s specification system.
Density
Explain whether the overall appearance should feel open, balanced, or full. Remember that perceived fullness can also be affected by fiber thickness, spacing, and overlap.
Arrangement
Describe the direction, grouping, spacing, and layering of the fibers. A reference image can be especially helpful when the design includes peaks, uneven lengths, or a particular texture.
These descriptions communicate the visual direction. They do not replace technical specifications that may be required for a particular product or manufacturing process.
3. Build a Clear Design Brief
A design brief turns an idea into information that another person can understand and discuss. It does not need to be complicated. Its purpose is to reduce guesswork and make important decisions visible.
A Useful Brief May Include
- Project name: A short name to identify the concept.
- Design goal: The appearance or experience the design is intended to create.
- Intended user or occasion: The audience or use context being considered.
- Visual references: Images, sketches, or existing samples that communicate the direction.
- Design features: Notes about length, curl, density, and arrangement.
- Preferences: Features that are important to keep.
- Open questions: Details that need discussion or confirmation.
It is also useful to distinguish between a requirement and a preference. A requirement is something the design must meet. A preference is something you would like to achieve if it is practical.
Example: “The design should have a soft, textured appearance with visible length variation. The overall silhouette should not look uniformly dense. The exact construction and specifications are open for discussion after reviewing the reference.”
4. Discuss Materials and Construction
Visual direction is only one part of product development. A physical sample also depends on materials and construction choices. These choices may differ significantly between strip lashes, cluster lashes, and professional extension products.
Before sampling, discuss the relevant questions with the manufacturer rather than assuming that one specification applies to every product category.
Topics to Clarify
- Which product category and construction type are being developed?
- What material options are available for this product?
- Are there reference specifications or existing constructions to compare?
- Which design details can be adjusted during sampling?
- Are there limitations that may affect the intended appearance?
- What information or files does the manufacturer need before starting?
Not every question needs to be answered immediately. Some decisions become clearer after the manufacturer reviews the brief and discusses available options.
5. From Design Brief to Sample
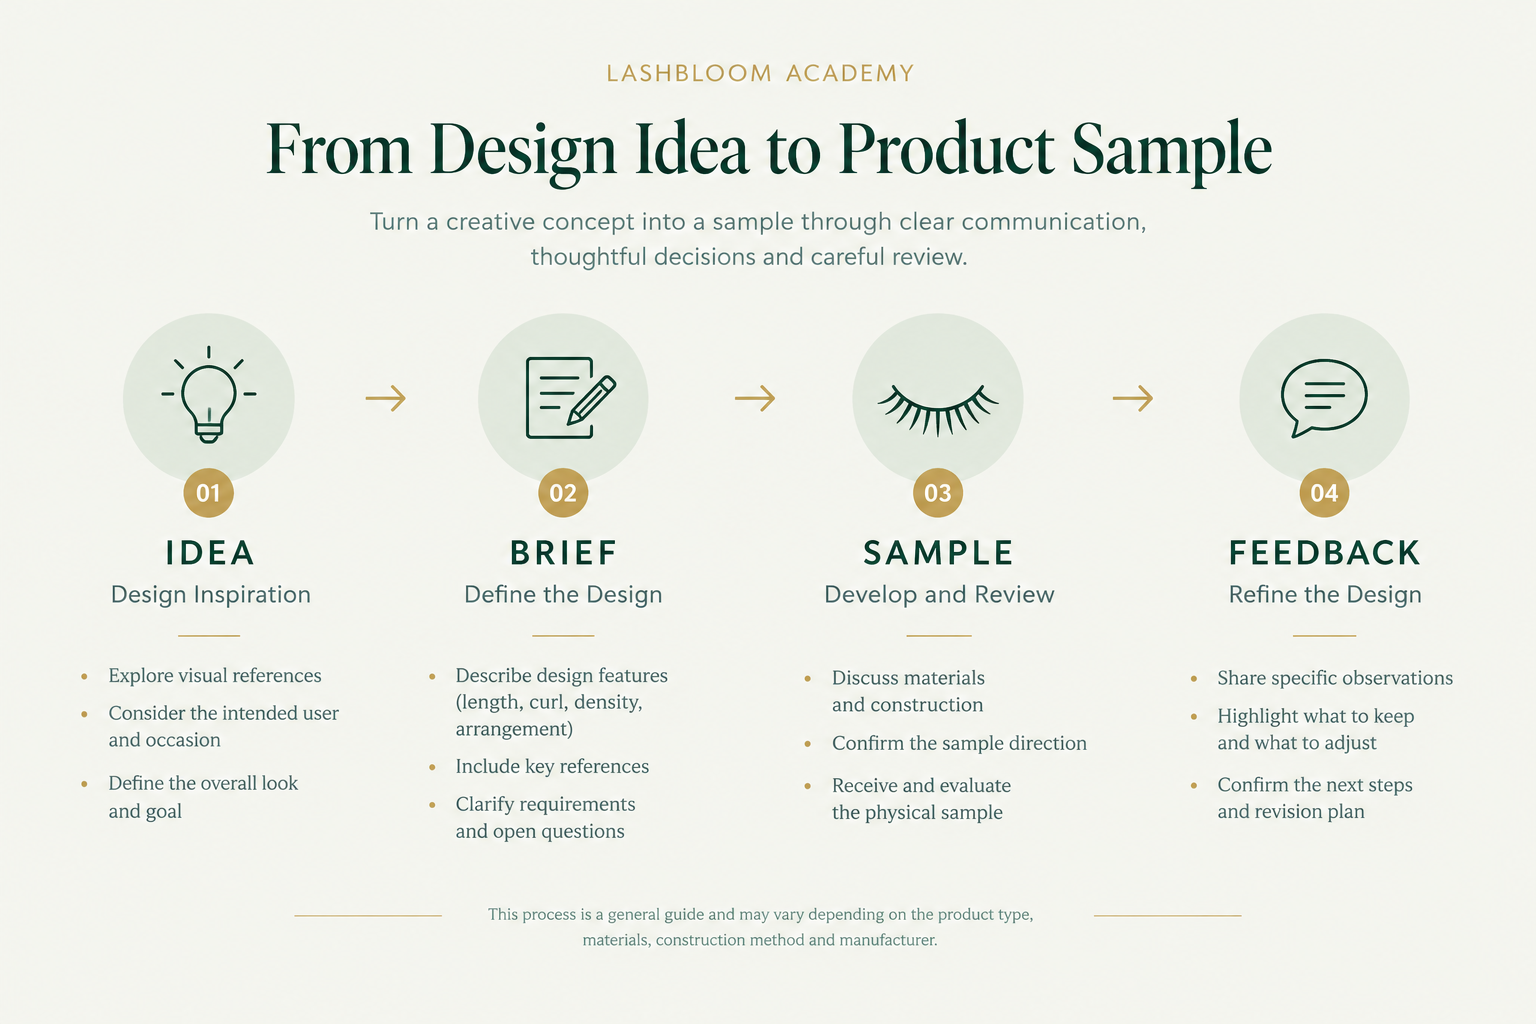
After the design direction and relevant details have been discussed, the next step may be to develop a physical sample. A sample makes it possible to evaluate the actual product rather than relying only on written descriptions or images.
A general development conversation may include these stages:
- Share the brief: Provide the design goal, references, and known preferences.
- Review feasibility: Discuss materials, construction options, and details that need clarification.
- Confirm the sample direction: Agree on what the first sample is intended to demonstrate.
- Develop the sample: The manufacturer prepares a sample according to the agreed direction.
- Review and record: Observe the sample and document what matches the brief and what may need adjustment.
This is a general learning framework, not a fixed production schedule. The actual steps, timing, and documentation depend on the project and the manufacturer’s process.
6. Review the Sample Carefully
When a sample is available, compare it with the original design brief. Try not to rely only on a quick first impression. Look at the details that were important to the concept.
Review the Appearance
- Does the overall silhouette match the intended direction?
- Are the visible lengths arranged as expected?
- Does the curve appear consistent with the agreed reference?
- Does the design look more open or fuller than intended?
- Are the direction, grouping, and layering close to the brief?
Review the Product as a Whole
Depending on the product category, other considerations may include the appearance of the band or base, the consistency of construction, the finish, packaging requirements, and any agreed evaluation criteria.
Do not assume that a visual review alone confirms every performance, safety, or quality characteristic. Those may require separate checks appropriate to the product and its intended use.
7. Give Useful Feedback
Feedback is most helpful when it describes an observable difference and explains what should change. General comments such as “make it better” or “make it prettier” are difficult to act on because they do not identify the issue.
Make Feedback Specific
Instead of saying:
“The sample does not look right.”
Try describing what you observe:
“The sample looks more uniform than the reference. We would like to explore greater visible length variation while keeping the overall appearance relatively open.”
When possible, include a marked-up photograph or identify the exact area being discussed. This can help both sides refer to the same detail.
Separate Observations from Suggestions
- Observation: What you can see in the sample.
- Difference: How it differs from the brief or reference.
- Suggestion: What you would like to explore or adjust.
- Priority: Whether the change is essential or optional.
Clear feedback creates a more useful discussion and helps keep the next revision focused.
8. Try It Yourself: Create a Lash Design Brief
Choose a lash design idea. It can be inspired by a photograph, a product you have seen, or a look you would like to develop. Use the worksheet below to organize your first thoughts.
Step 1 — Describe Your Concept
| Brief Item | Your Notes |
|---|---|
| Project name | ________ |
| Intended user or occasion | ________ |
| Overall appearance | ________ |
| Visual reference | ________ |
Step 2 — Describe the Design Features
| Design Element | What Do You Want? |
|---|---|
| Length | ________ |
| Curl | ________ |
| Density | ________ |
| Arrangement | ________ |
Step 3 — Prepare for a Discussion
- Which features are essential?
- Which details are still open for discussion?
- What should the manufacturer help clarify?
- What would you look for when reviewing the first sample?
There may be more than one practical way to develop a design. The goal of the brief is to communicate the direction clearly enough for a productive conversation to begin.
Key Takeaways
- A useful design process begins with a clear idea and an intended appearance.
- Length, curl, density, and arrangement help describe the visual direction.
- A design brief organizes references, preferences, requirements, and open questions.
- Materials and construction should be discussed in the context of the specific product category.
- A sample allows the design to be reviewed as a physical product.
- Specific, observable feedback is more useful than vague opinions.
Continue Learning
You have now explored how a lash design idea can be organized into a brief, discussed with a manufacturer, and reviewed through a sample. The next step is to understand how product details, presentation, and customer needs come together when preparing a product for the market.
Coming next: From Sample to Product: Preparing a Lash Design for the Market